I've had a Nordic nRF52840 Dongle sitting in a parts box for a while. Tiny USB device, supports Bluetooth 5, Thread, Zigbee. I knew it was useful but hadn't actually done anything with it.
After picking up the RTL-TRNG project (entropy from radio noise) I started thinking more seriously about radio and wireless protocols. Bluetooth is everywhere — phones, keyboards, sensors, smart home devices — and I realised I had no idea how any of it actually worked beneath the surface.
So I decided to fix that. The goal wasn't to immediately start hacking things. It was to understand how Bluetooth Low Energy actually works before touching anything more advanced. This is that journey — from plugging in a blank dongle to watching real Bluetooth traffic flow through the air around my homelab.
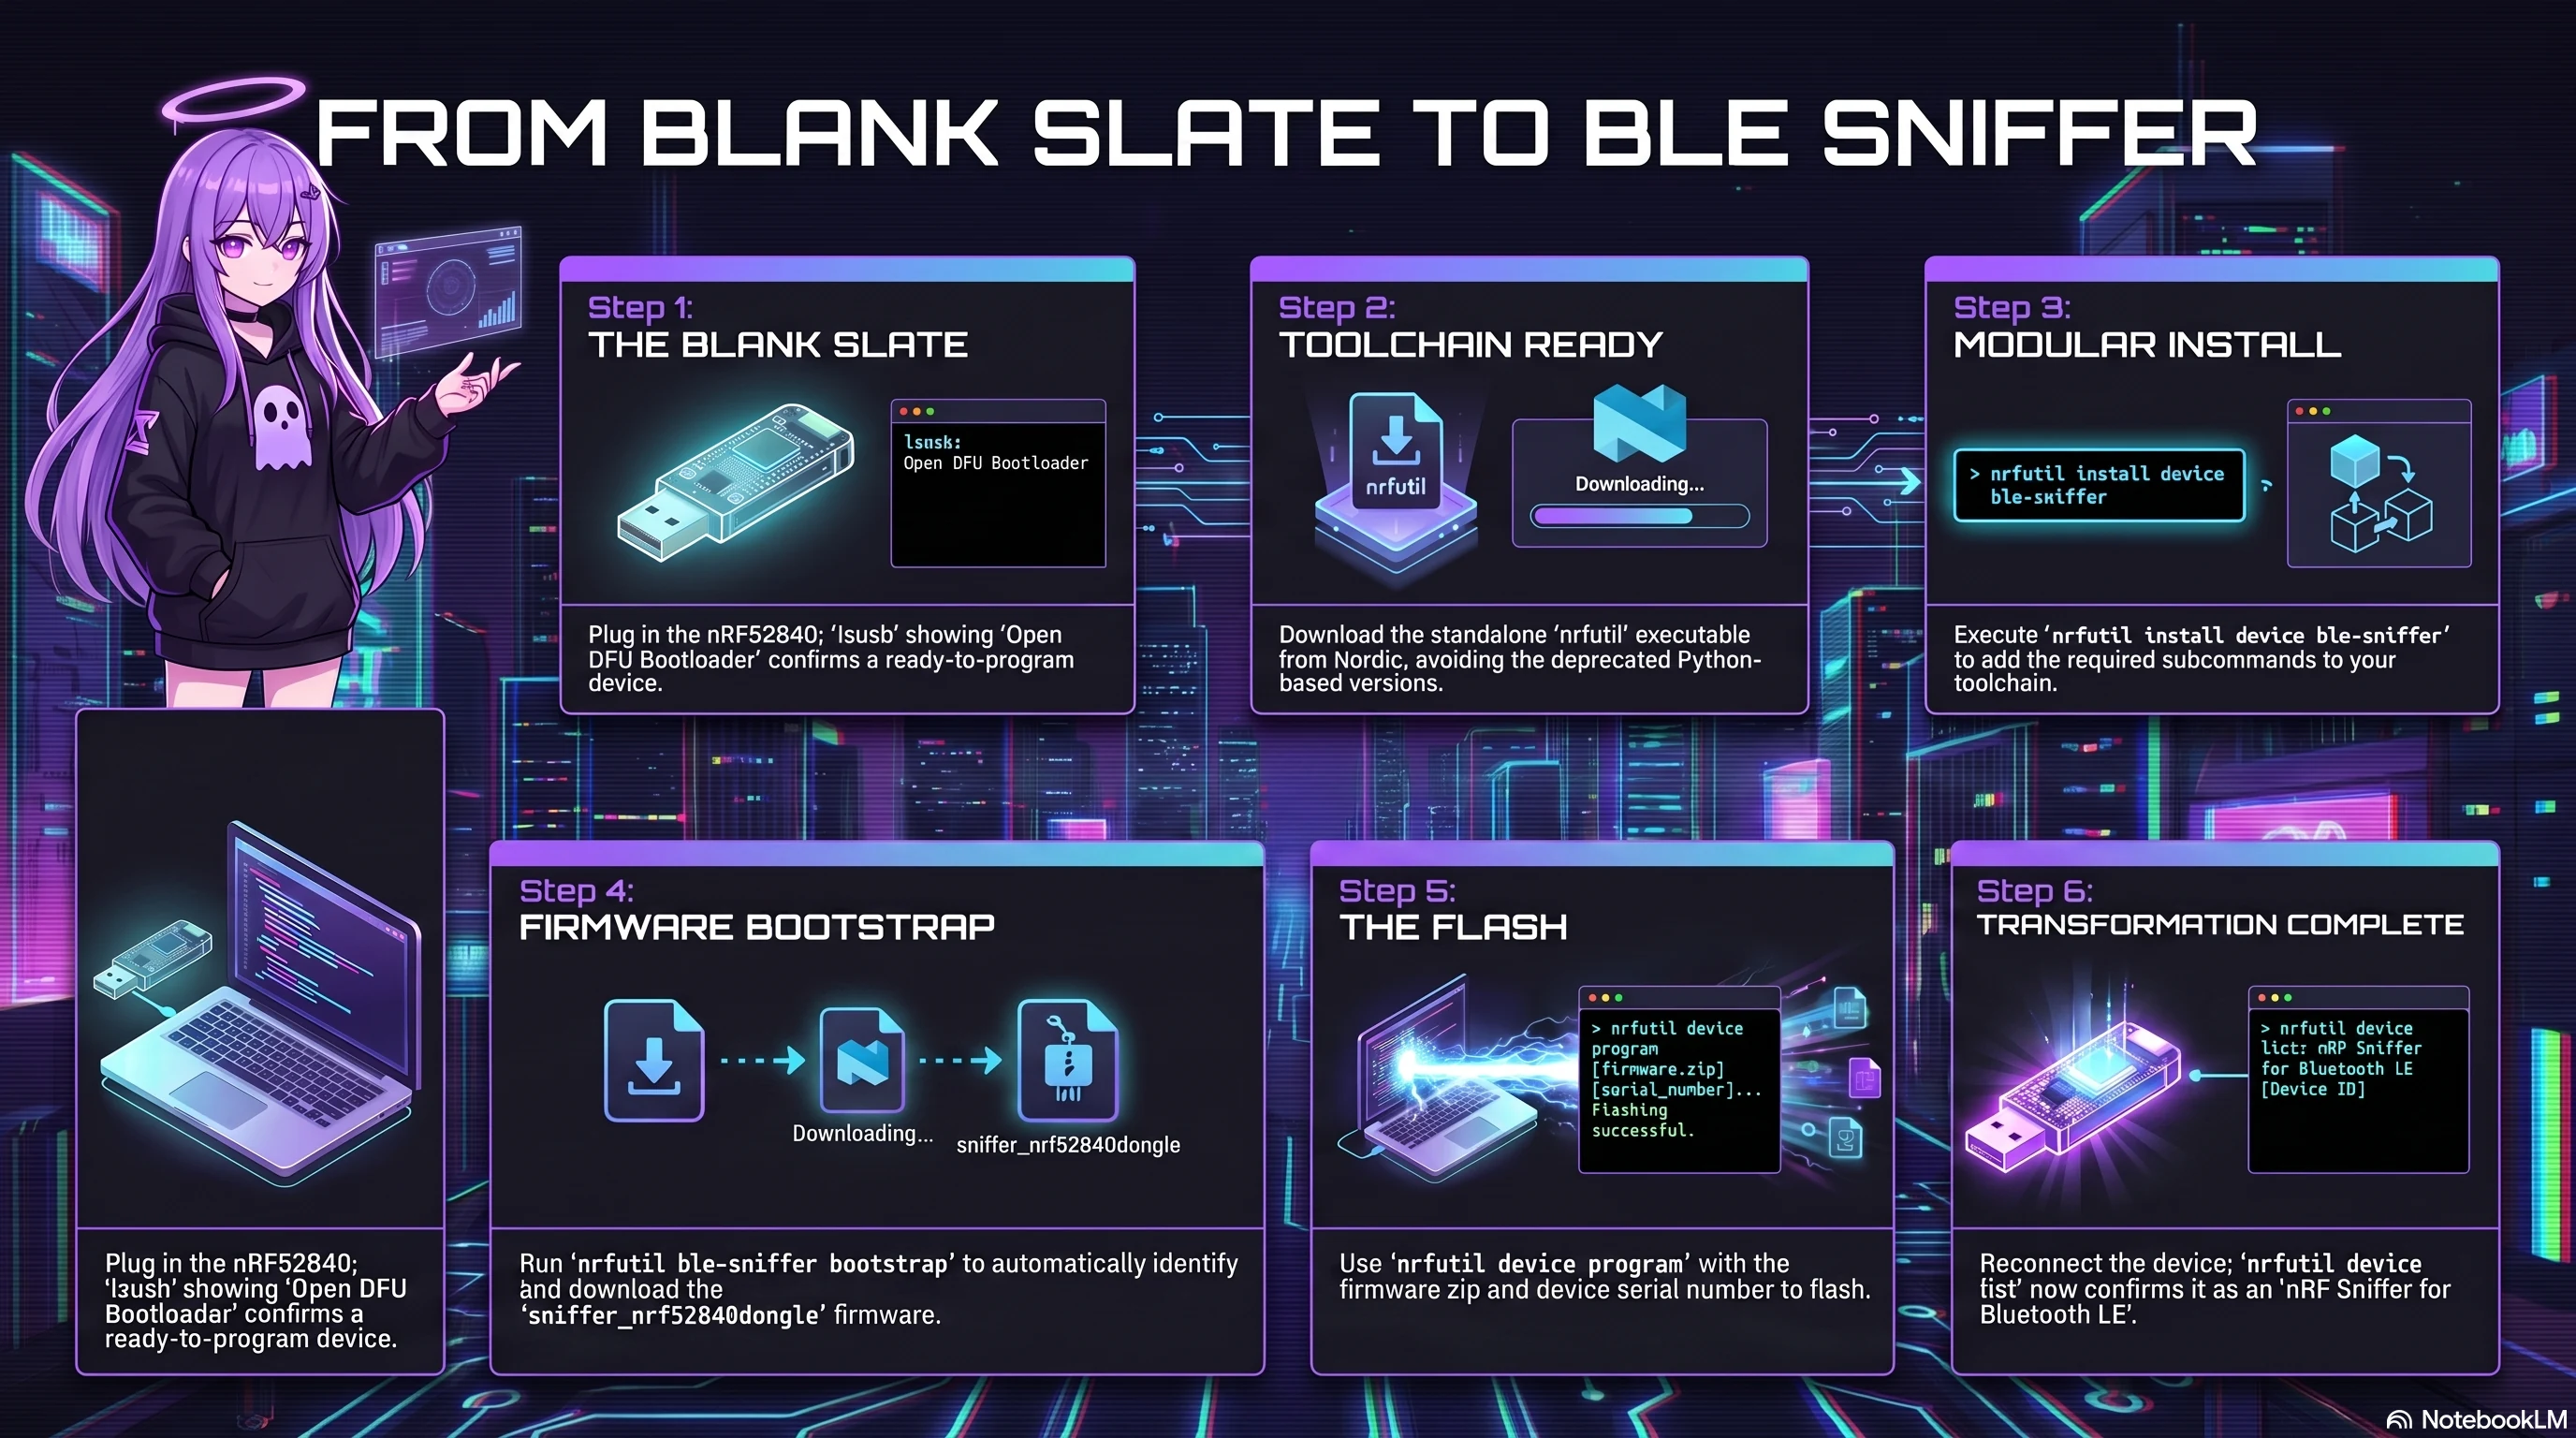
The full setup process at a glance.
The Hardware
The Nordic Semiconductor nRF52840 Dongle (PCA10059) is not a fixed-purpose hacking tool. That's actually one of the things that makes it interesting.
Depending on the firmware installed, the exact same hardware can become a Bluetooth LE sniffer, a Bluetooth development board, a Thread or Matter platform, a Zigbee device, or a completely custom embedded project. Changing role means changing firmware — nothing else.
That flexibility is why the nRF52840 is popular with both embedded developers and security researchers. It's more like a small programmable computer than a single-purpose USB dongle.
First Connection — The DFU Bootloader Surprise
The first thing I did was plug it into the Kali box and check what Linux could see.
lsusb
I was expecting to see something Bluetooth-related. Instead:
1915:521f Nordic Semiconductor ASA Open DFU Bootloader
No Bluetooth device. Just a DFU Bootloader. My first assumption was that something had gone wrong, or I had the wrong hardware.
Turns out that's completely normal. A brand new nRF52840 Dongle ships without application firmware. The DFU Bootloader is the blank-slate state — it's waiting for firmware to be installed before it becomes anything.
/dev/ttyACM0 confirmed communication was working fine.
Choosing the Right Toolchain
Nordic provides a tool called nrfutil for managing their devices. The catch is there are two versions of it, and choosing the wrong one wastes a lot of time.
The older version is a Python package — and it's no longer compatible with modern Python versions. My Kali machine is running Python 3.13, which rules it out entirely.
Nordic's current solution is a standalone executable that handles everything without Python dependencies. It's modular — you install only the subcommands you need — and it's officially supported.
I created a dedicated workspace to keep everything Bluetooth-related together:
~/tools/nordic/
Then downloaded the latest Linux x86_64 standalone binary directly from Nordic, made it executable, and confirmed it was working:
chmod +x ~/tools/nordic/nrfutil
~/tools/nordic/nrfutil --version
nrfutil 8.2.0
Installing the BLE Sniffer Components
nRF Util is modular, so Bluetooth sniffing support has to be installed as additional commands:
~/tools/nordic/nrfutil install device ble-sniffer
Once complete, three packages were installed:
core
device
ble-sniffer
Before touching the firmware, I checked whether nRF Util could actually communicate with the dongle:
~/tools/nordic/nrfutil device list
Product: Open DFU Bootloader
Board Version: PCA10059
Correct hardware, USB connection working. Ready to flash.
Flashing the BLE Sniffer Firmware
The bootstrap command downloads everything needed and identifies the correct firmware for your specific hardware:
~/tools/nordic/nrfutil ble-sniffer bootstrap
The bootstrap revealed the exact firmware image for my dongle:
sniffer_nrf52840dongle_nrf52840_4.1.1.zip
Knowing the firmware came directly from Nordic (not a third-party build) made me confident I had the right image for the PCA10059. Then the actual flash:
~/tools/nordic/nrfutil device program \
    --firmware sniffer_nrf52840dongle_nrf52840_4.1.1.zip \
    --serial-number C3F28E80DC8C
A few seconds later it was done. No external programmer needed, no special cables — just USB.
After unplugging and reconnecting the dongle, I checked it again:
~/tools/nordic/nrfutil device list
Product: nRF Sniffer for Bluetooth LE
That single line confirmed the transformation was complete. The blank development board had become a dedicated Bluetooth Low Energy packet sniffer.
The First Capture — Nothing Is Happening (Or So I Thought)
This is the part that nearly fooled me.
I launched the sniffer:
~/tools/nordic/nrfutil ble-sniffer sniff \
    --port /dev/ttyACM0 \
    --only-advertising
Nothing.
No devices listed. No packet counter. No scrolling output. Just a blinking cursor. For a moment I genuinely thought something had failed during the flash.
Instead of immediately assuming it was broken, I started checking what the process had actually been doing. The breakthrough came when I looked in the working directory.
New files were appearing automatically:
20260709-T093744.940262115UTC-capture.pcap
20260709-T094140.231091276UTC-capture.pcap
The sniffer wasn't designed to dump packets to the terminal. It silently writes everything into standard PCAP files for analysis with Wireshark and other packet tools.
What Was Actually In Those Files
Using Wireshark's command-line utility to inspect the captures:
capinfos capture.pcap
Over 40,000 Bluetooth packets. It had been working perfectly the entire time.
Using tshark to inspect packets directly from the terminal revealed a stream of different Bluetooth Low Energy advertising types:
ADV_IND
ADV_NONCONN_IND
ADV_SCAN_IND
ADV_EXT_IND
SCAN_REQ
At first those are just labels. But each one describes a different behaviour in the BLE advertising protocol:
Identifying What Was in the Air
Extracting manufacturer identifiers from the captures revealed which companies' devices were nearby.
The most common identifier was 0x004C — Apple — appearing repeatedly across the captures. Alongside it was 0x0006, which belongs to Microsoft according to the Bluetooth SIG company identifier registry.
One important thing I learned quickly: manufacturer data in a BLE advertisement identifies the company responsible for that advertising format, not necessarily the retail product you can see in front of you. Don't jump to conclusions when reading these values.
A closer look at individual packets showed the full picture — advertising type, Bluetooth channel, manufacturer data, signal strength, and CRC status. One Apple advertisement from the capture:
Type:         ADV_NONCONN_IND
Address:      Random (randomised for privacy)
RSSI:         -65 dBm
Manufacturer: Apple (0x004C)
CRC:          OK
Modern Bluetooth devices frequently randomise their hardware addresses to reduce long-term tracking. That explained why none of the addresses looked like fixed MAC addresses — they weren't meant to be.
Signal strength gave a useful hint about proximity. Some devices were appearing consistently at around -46 to -54 dBm — relatively strong signals suggesting something physically close. Others at -65 to -70 dBm were further away. It was a first glimpse into how RSSI can be used to estimate physical proximity from radio data alone.
What I Actually Learned
The setup lessons were less interesting than the mindset ones.
Before this, Bluetooth felt like a black box — it worked, or it didn't, and there was no way to see inside. Now I can watch devices advertising themselves in real time, inspect the contents of those advertisements, measure signal strength, and identify patterns across dozens of simultaneous broadcasts.
The two lessons I'll carry forward:
Don't assume failure without evidence. The sniffer appeared to be doing nothing. In reality it had captured tens of thousands of packets from the moment I launched it. First step is always to understand what the tool is designed to do.
Validate what your tools are showing you. Some packet fields looked like manufacturer identifiers but turned out to be decoding artefacts from how tshark was parsing certain packet types. Protocol analysis is as much about understanding your tools as it is about understanding the data.
Where This Goes Next
The hardware is now a working BLE sniffer. The foundation is in place. The next stage moves away from setup and into actual protocol exploration:
Identifying nearby BLE devices by name. Exploring GATT services — the layer where Bluetooth devices actually expose their functions. Following individual devices through a capture. Understanding how Bluetooth pairing works, and what encrypted versus unencrypted traffic looks like in a packet capture.
Eventually I want to build a Python dashboard that visualises nearby BLE activity in real time — something that could live on the home lab and show a live map of what's broadcasting in the room.
The setup phase is done. The learning phase has started.